Platform: Browser
User: Administrator, Educator, Learner
The following steps describe how to record and mark up videos using a built-in or external webcam.
Starting the Recorder in the Browser
1. Log in to your account and click the "Add New Video" button like you normally would if you were uploading a video.

2. Enter video details and press the "Save and Continue to Upload" button.

3. Click the "Record & Upload Video" button.
4. You will be asked to allow camera and microphone access. Press "Allow."
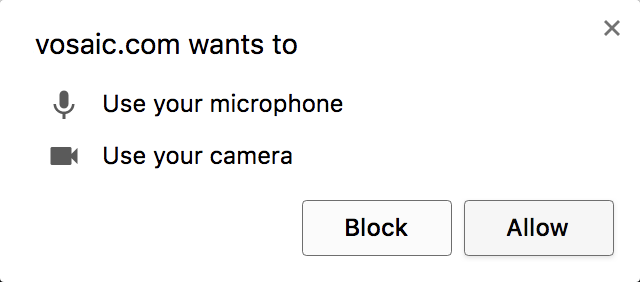
NOTE: If your camera is blocked, you will see a black loading screen. You won't be able to tell if your microphone is blocked automatically, so follow this step to ensure your video has sound.
- Press the button next to the URL in google chrome that says "Secure."
- In the drop down menu, make sure that both the camera and microphone are set to Allow.
- Refresh the page to ensure that any settings changes are saved.
7. In the bottom right of the webcam screen, select your desired camera and microphone from the drop down buttons.
NOTE: (For Mac Users Only) Sometimes an external webcam does not show up in the drop down menu for camera options. If this occurs, press command + spacebar, type in "Terminal", and press Enter. Then type in the following message: sudo killall VDCAssistant. Then press Enter. Refresh your browser and the issue should be resolved.
Recording and Marking Up Video
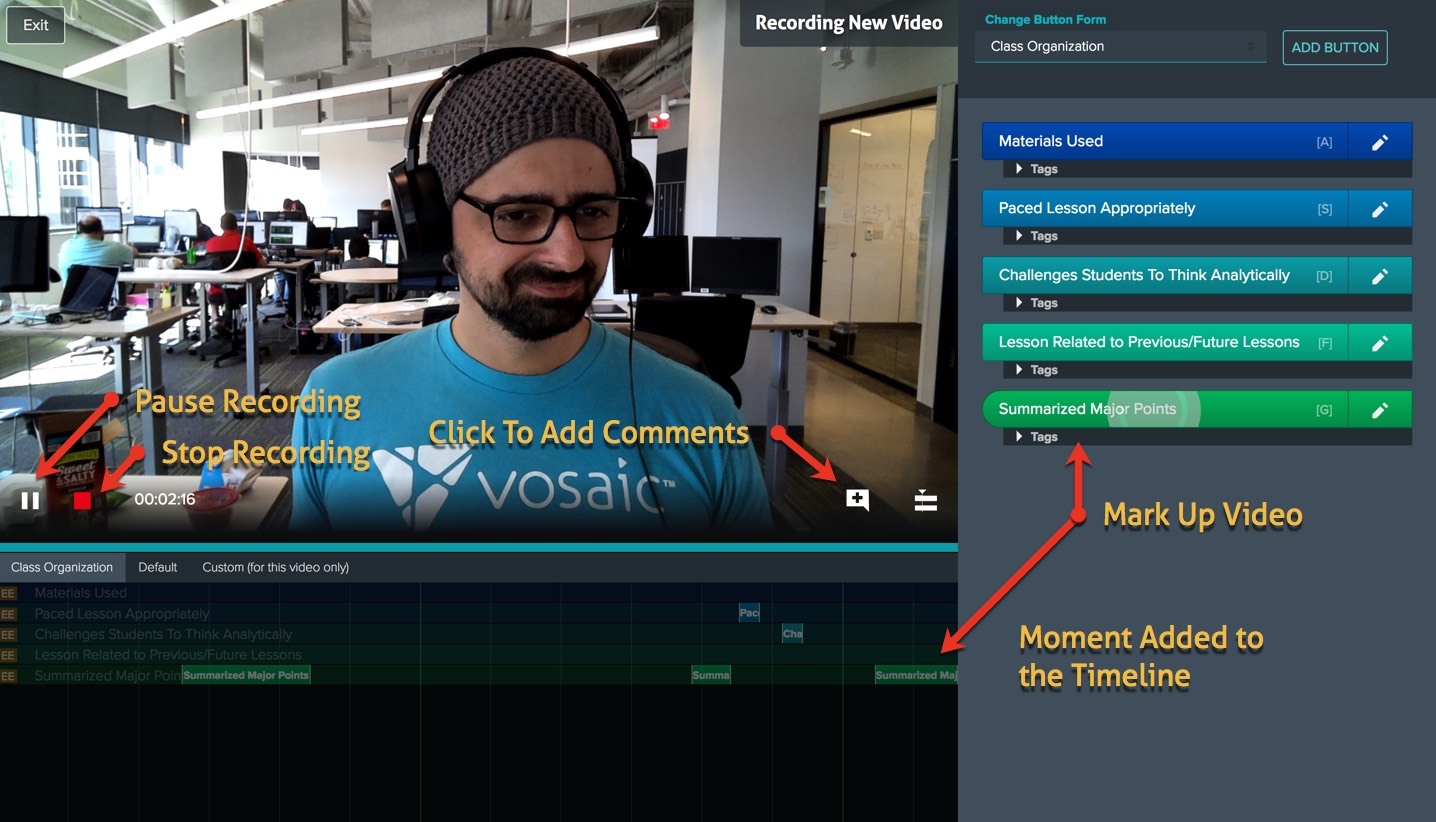
1. To start recording, press the "Record" button.
2. Use the markup buttons the same way you would when marking up a pre-recorded video.
3. Press the "Pause" button if you need to pause recording. Press "Record" again to resume recording.
4. To end recording, press the red "Stop" button.
Uploading Video from the Recorder
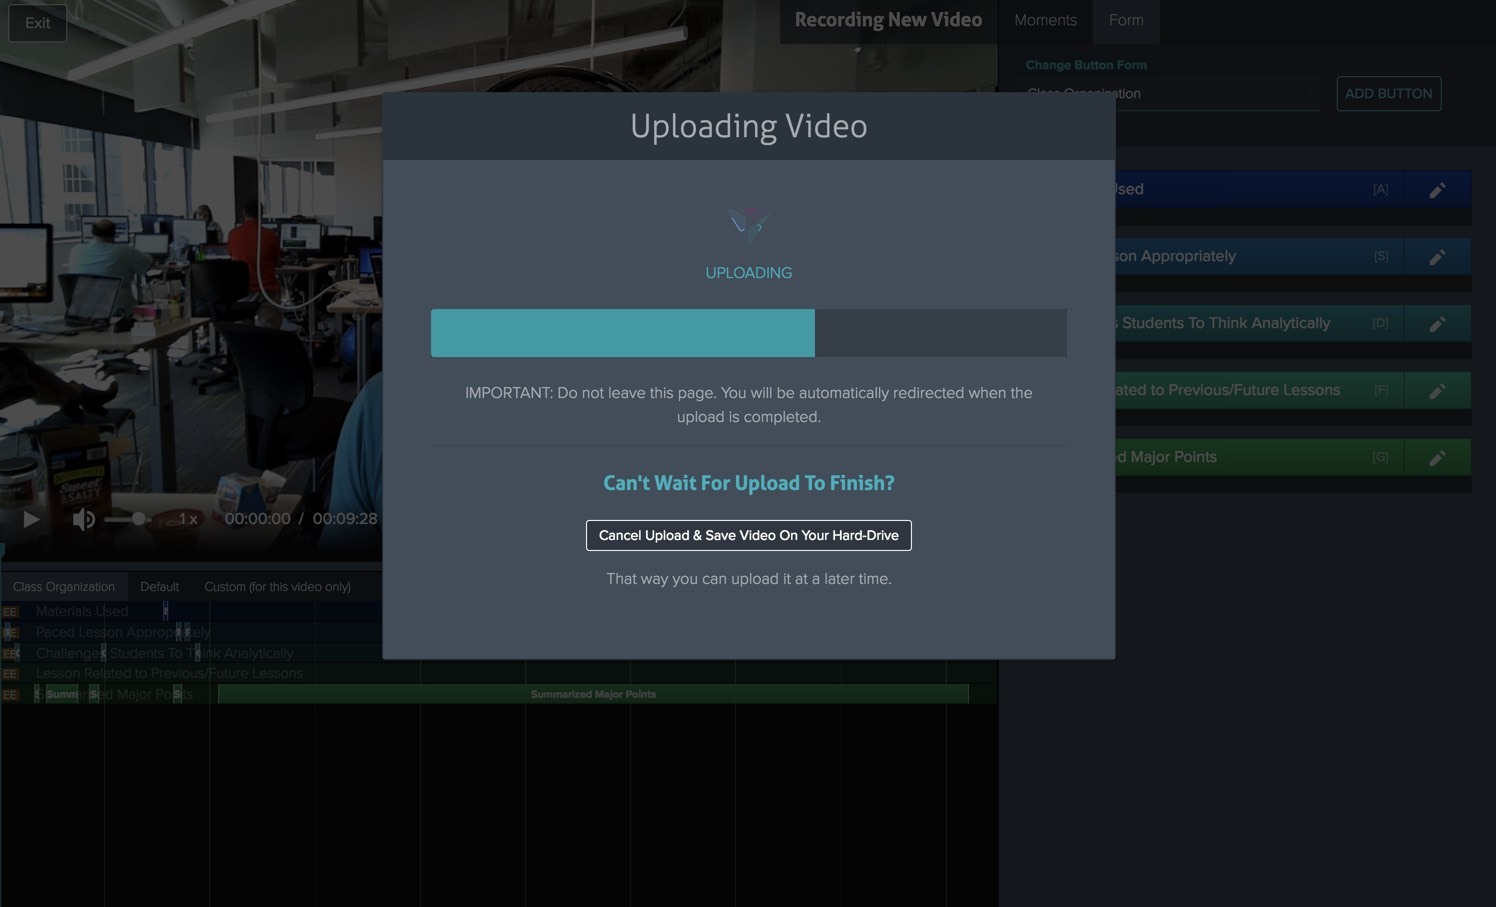
1. The video will upload automatically. If you press "Cancel" before the video uploads, then the video will automatically download to your computer and you can upload it at a later time.
2. You will be redirected to the "Videos" page where the video will take a moment to process. Processing time depends on the video length. For a 30 minute video, the wait is 2-4 minutes. If you don't see the video by then, refresh your page.