This article explains how to capture (IP or hard-wired) streams into Vosaic using both hardware and software solutions. For either option to work you will need additional software or hardware.
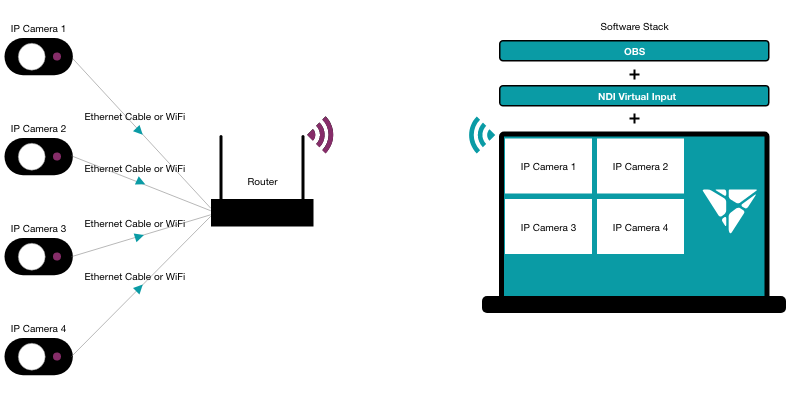
OBS (Open Broadcaster Software) is free software that allows you to capture single, or multiple streams into one using software instead of hardware solution. What’s great about this is that you can use RTSP streams from a single, or multiple IP cameras and combine them into one stream that can be ingested with Vosaic.
NDI (Network Device Interface) helps handle video and audio over an IP network. It can be downloaded for free and used in many different scenarios, but the one we’ll use here is to convert an OBS stream into a virtual webcam that can be captured by Vosaic.
Vosaic allows you to record, live code, and analyze videos. Some of the most popular use cases are for pre-service teacher training, educational research, instructional coaching, teacher observations, and recording and coding of medical simulations for debrief and research. You can start with a free Vosaic trial today.
Recording videos using an internal or external webcam is really easy with Vosaic. You simply start a recording session and select which camera you want to use.
But if you need to record a stream from an IP camera, you’ll need either additional hardware or software.
Using Hardware to Capture IP Streams
IMPORTANT: Please consult with your A/V provider/IT team about what hardware is needed to make this work. If you’re already using IP cameras, you may already have everything you need in place.
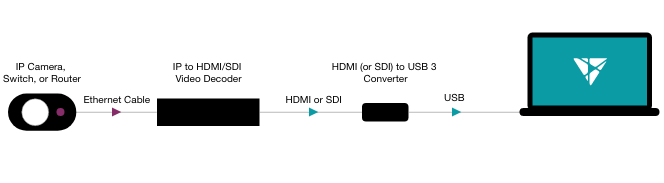
To capture an IP stream using hardware you’ll need to use an IP-Camera-to-HDMI Converter/Decoder and an HDMI to USB capture card. Together, those two pieces of hardware convert an IP video into a stream that essentially resembles an external webcam that can be used with Vosaic, Zoom, Google Meet, or any other software that can capture video.
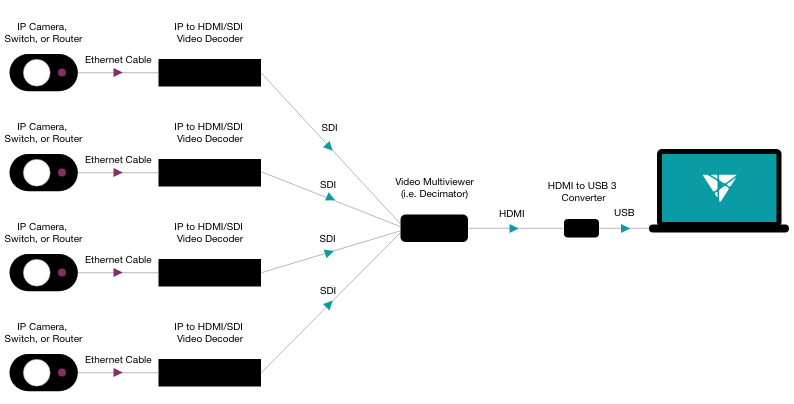
If you need to combine multiple IP camera feeds into one, you would also need something like a Decimator Multiviewer.
Nice thing about using a hardware solution is that it is end-user friendly. Once set up, all you need to do is plug the USB cable into a computer, launch Vosaic and start recording.
Using Software to Capture IP Streams
Here's a preview of using OBS and NDI Tools in Vosaic:
To get started with a software solution you’ll need to complete following steps:
- Install OBS
- Install NDI Tools
- Install NDI Plugin for OBS
- Configure OBS to use NDI
- Load Camera Streams in OBS
This looks like a lot, but the steps are very simple and straightforward.
Install OBS
Visit OBS website and download and launch the installer for your operating system. Simply follow the steps to finalize your installation.

Install NDI Tools
Visit NDI website and scroll until you find the download section.
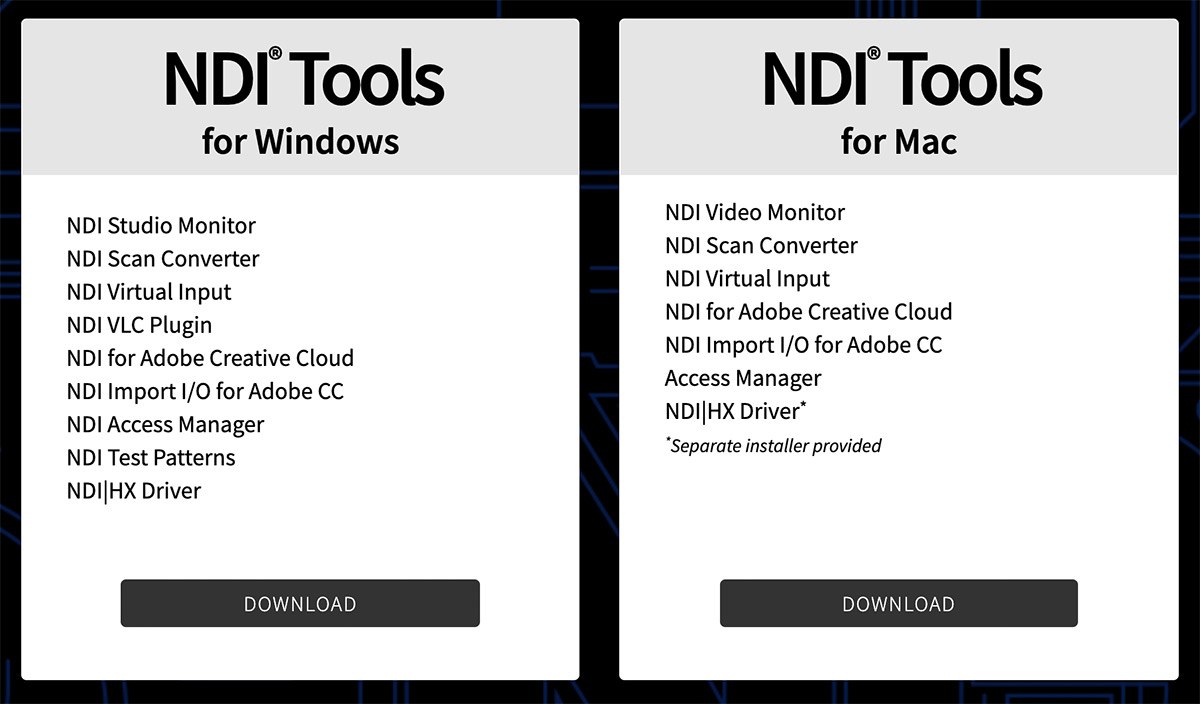
Windows
Windows will download and install with an installer.
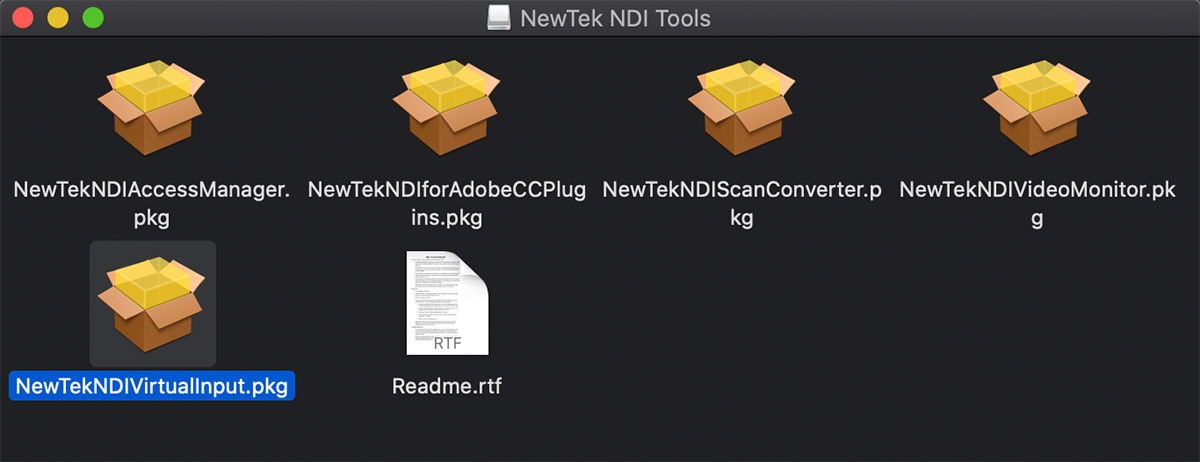
Mac
Mac will download a “.dmg” file with a couple of packages. Double-click to open the .dmg file, and install NewTekNDIVirtulInput.pkg.
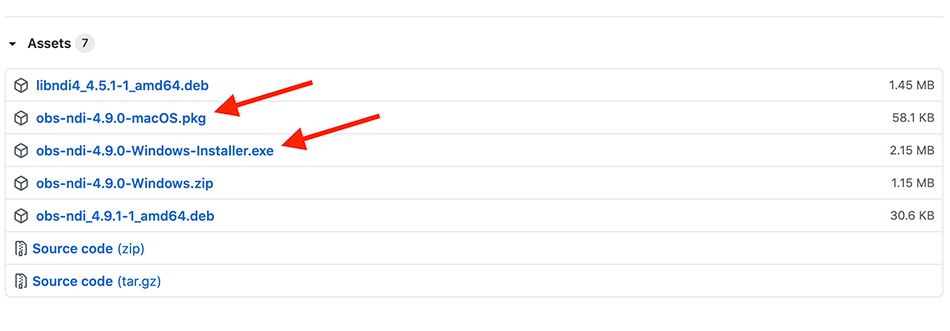
Install NDI Plugin for OBS
Download and install NDI Plugin for OBS for your operating system.
Configure OBS to use NDI
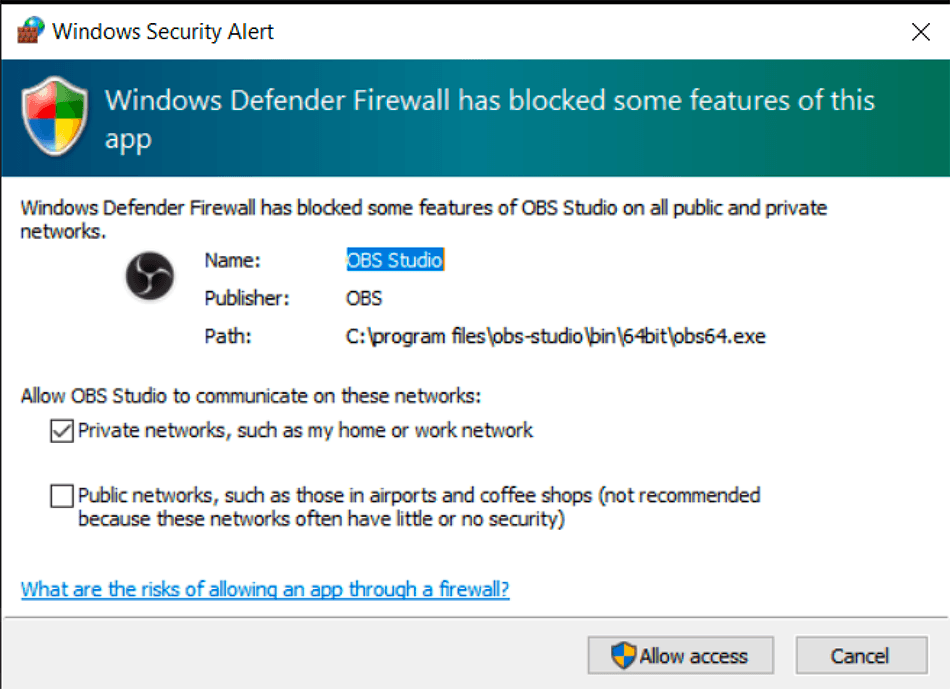
Windows
Start the OBS. If you get a Windows Defender warning, make sure to click “Allow Access”.
From the Tools menu select NDI Output Settings option.
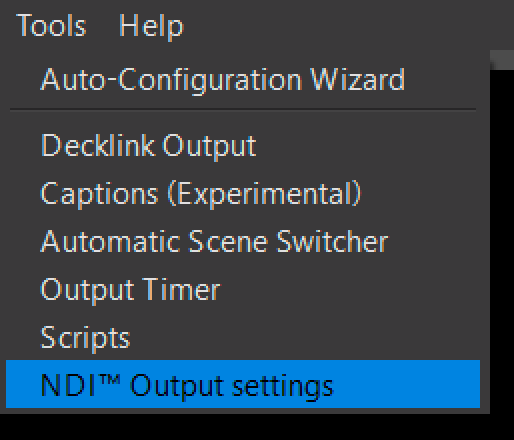
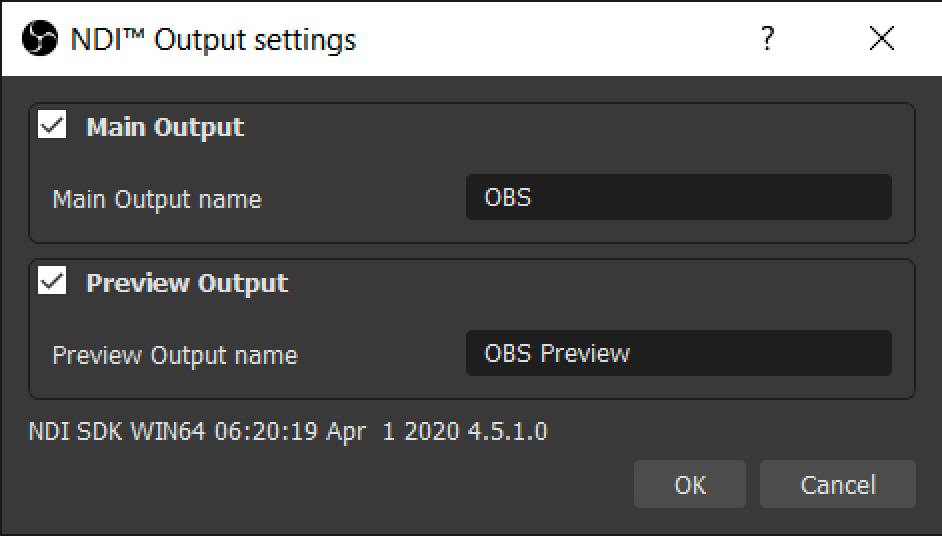
Check both options “Main Output” and “Preview Output” and press OK.
Mac
When you launch OBS you may get this warning message
NDI Runtime not found. Download the installer here.
Click the link in the message and follow the instructions to download and install the suggested runtime.
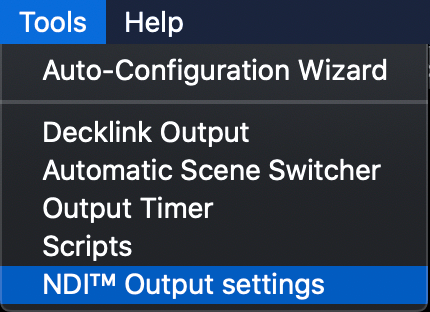
After OBS is started, open the NDI Output setting from Tools.
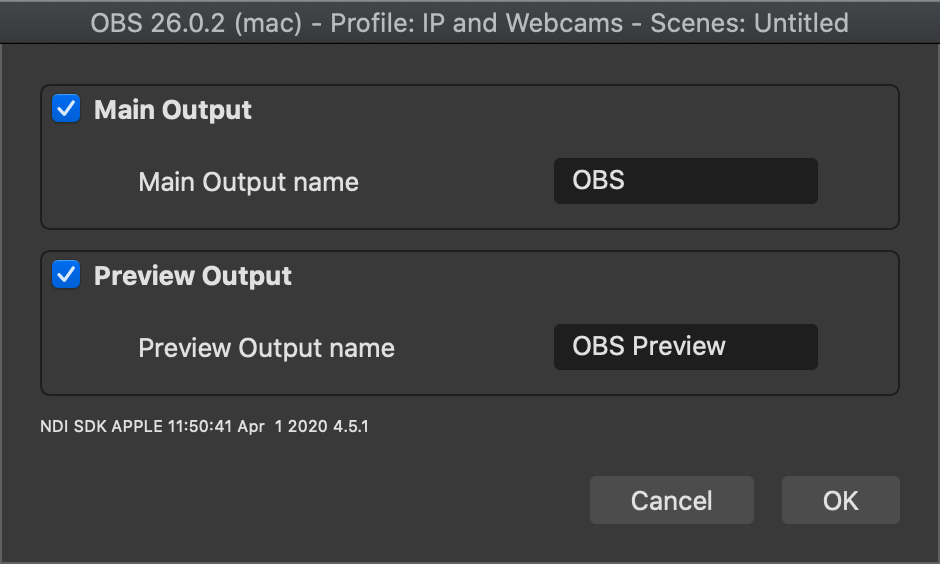
Check both options “Main Output” and “Preview Output” and press OK.
This concludes the installation and configuration part of the setup.
Load Camera Streams in OBS
To add IP video to OBS do following.
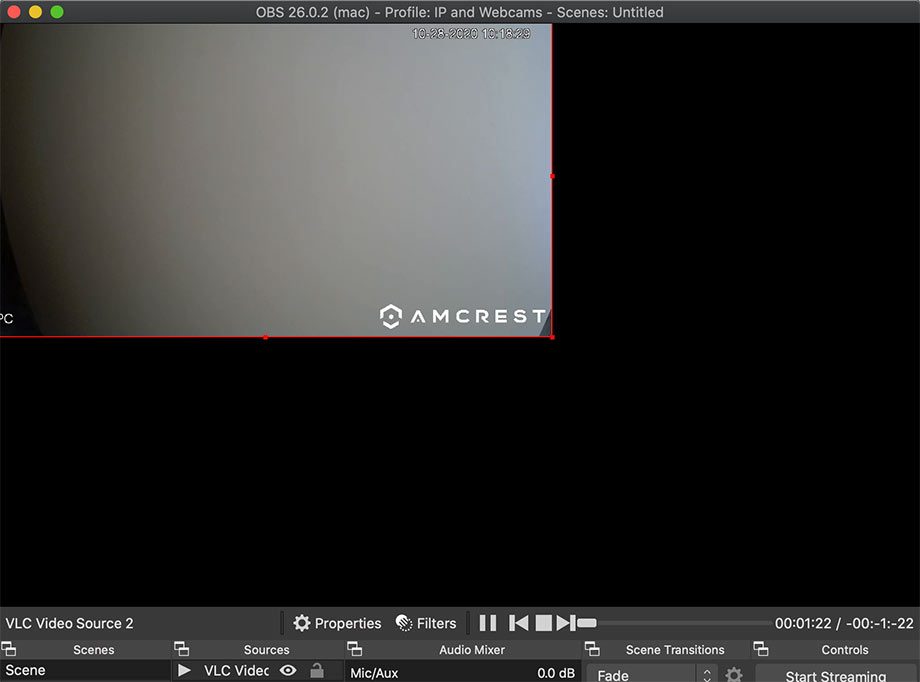
Launch OBS and locate the “Sources” panel at the bottom of the window.
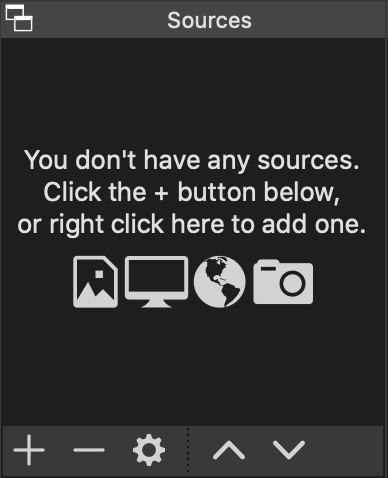
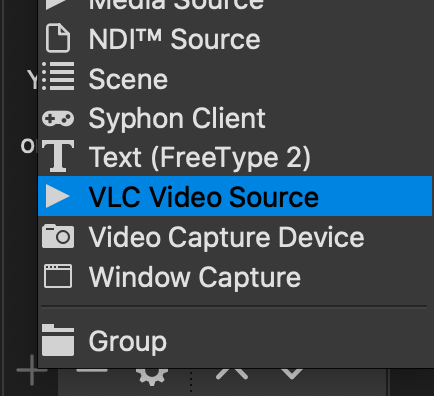
Press the plus “+” icon to and select “VLC Video Source”
NOTE: If you’re not seeing “VLC Video Source” as an option please make sure that you have correct version of VLC player installed. If you are using 64bit OBS, you must install 64bit VLC and if you are using 32bit OBS, you must install 32bit VLC.
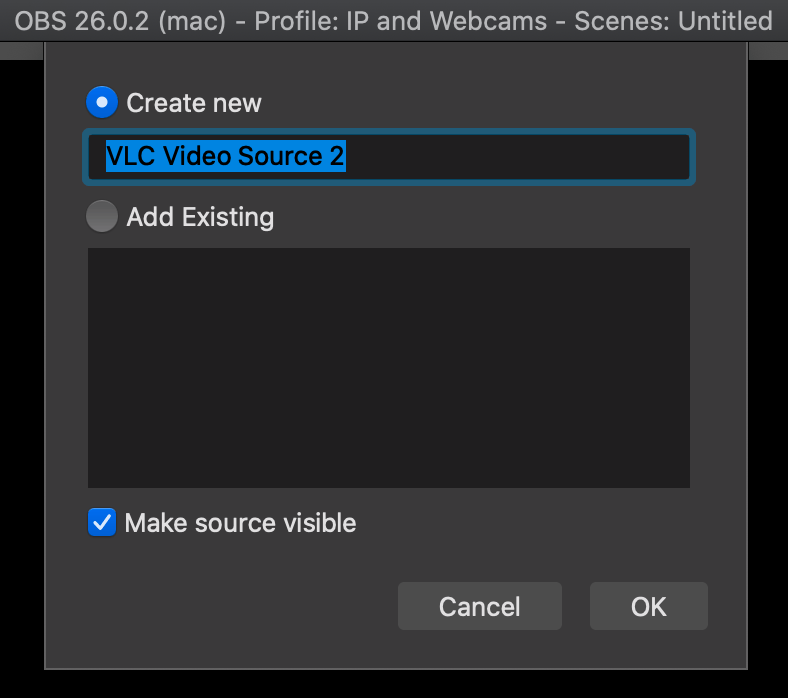
You’ll be asked to create a new stream
On the next screen press the plus “+” icon and select “Add Path/URL” option.
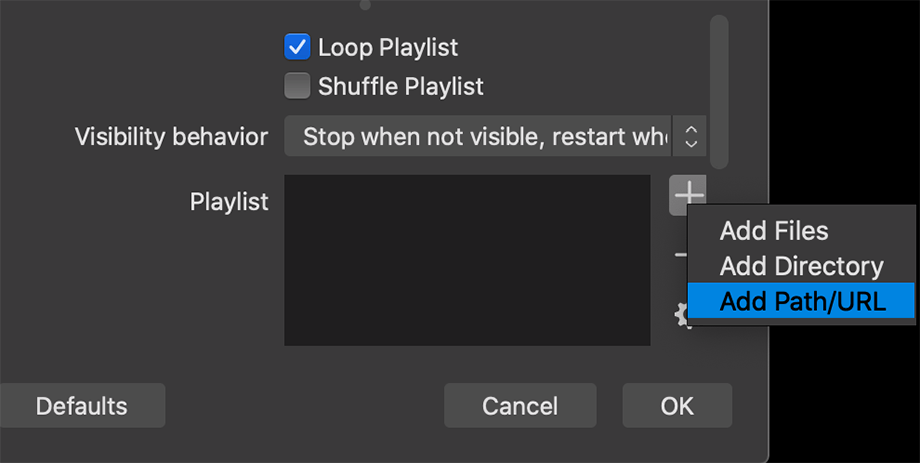
Enter the path in the pop up window. If needed, you can use this sample stream URL for testing: rtsp://wowzaec2demo.streamlock.net/vod/mp4:BigBuckBunny_115k.mov
Press OK.
Press OK again to close the Properties window and the IP stream will appear in the preview. You can click and drag the stream to reposition it, or click the resize handles to resize the video preview.
Repeat the steps above to add additional video streams. The nice thing is that OBS will remember your settings, so the next time you launch OBS, you won’t need to repeat these steps unless you’re adding or removing streams.
Record OBS streams in Vosaic
If you don't have a Vosaic account, you can start with a free trial today.
Launch OBS if not already open. It should default to the preconfigured streams we’ve just completed.
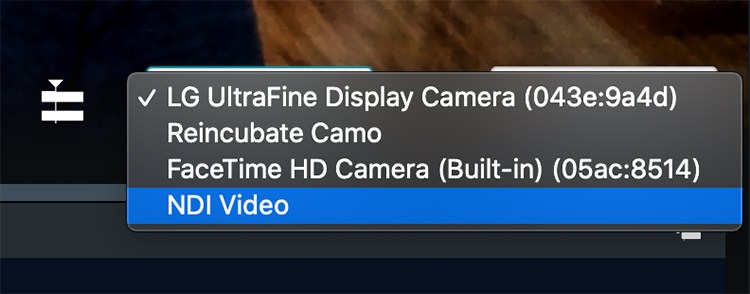
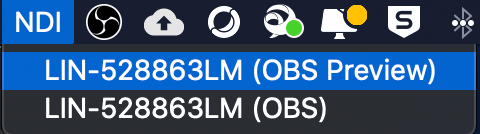
Launch NDI Virtual Input if not already launched. On Windows the icon is in the taskbar and you’ll have to right-click on it to select the source. On a Mac the NDI icon is in the menu bar and you can simply click on it to select the source.
Log in to Vosaic and start a new video recording.
On the video player, locate the camera source drop-down in the bottom right corner and select “NDI Input” from the drop-down.
The OBS preview will appear in Vosaic recorder, and it will be ready for recording.
As mentioned earlier, OBS will remember your settings. So the next time you launch it, you won't need to go through all of these steps. The only steps you'll need to do are:
- Launch OBS
- Launch NDI Virtual Input and select (OBS Preview) option
- Launch Vosaic to start recording